Add your survey link to Verasight Self-Serve, then set up our redirects in Qualtrics or any survey platform that can record link values. Each redirect must pass a test before you pay and launch.
#Before you begin
Have these ready before you click New survey:
- A researcher account.
- A finished survey. Build your survey covers survey platforms and Doc2Survey.
- An active survey and its anonymous link, not the edit or preview link. It is the one link anyone can use to take your survey, and it never changes.
- To find it in Qualtrics, open Distributions and choose Anonymous link.
- For a new survey, choose Web, click Use Anonymous Link, then click Resume response collection.
- The first time you publish a survey, Qualtrics also shows its anonymous link in the confirmation window.
- A survey that fits the survey rules. You confirm the quota and screen-out rules in Step 1.
- If you use an attention check, it must come from Verasight's pre-approved list.
#How the survey link and redirects work
When a panelist opens your survey, we add two parameters to your survey link:
surveyididentifies the survey.vsididentifies the panelist.
For example, www.survey.com becomes www.survey.com?surveyid=123&vsid=user123. Your survey has to record both.
When a respondent's survey ends, your survey sends them back to us through a redirect link. The redirect tells us how they left, and the vsid at its end tells us who they were. vsid is also the column that joins your survey responses to your data file.
Your survey can use up to three redirect links:
| Redirect (name in Self-Serve) | Send respondents here when | When you need it |
|---|---|---|
| Completes | They finish the survey. | Always. |
| Do Not Consent to Participate | They actively decline your consent form. | Only if your consent form has an opt-out choice, such as "No, I do not want to participate in this survey". |
| Fail Attention Check | They consent but fail your attention check. | Only if your survey has an attention check. |
Every redirect link from Self-Serve has the same form. This example is the Qualtrics version:
https://backend.verasight.io/surveys/redirect?surveyid=__vskey__<your survey id>&vsref=<1, 2 or 3>&vsid=${e://Field/vsid}vsref is 1 for Completes, 2 for Do Not Consent, and 3 for Fail Attention Check. The example is an illustration and does not work as a link.
Each redirect link is unique to your survey and to its path. Copy it from Self-Serve with the copy button next to it. Do not type it, edit it, or reuse a link from another study.
A redirect link built or changed by hand is not recognized. Respondents who reach it do not return to Verasight.
#Step 1: Configuration
In Configuration, you choose your sample, enter your question counts, add your survey link, and record vsid and surveyid.
- Choose a sample type and a sample size.
- Enter your question counts for the longest path a respondent can take through your survey.
- Select both confirmations of the quota and screen-out rules:
- I confirm that my survey does not contain quotas.
- The confirmation that your survey only terminates respondents who decline consent or fail an attention check, and has no other screen-outs.
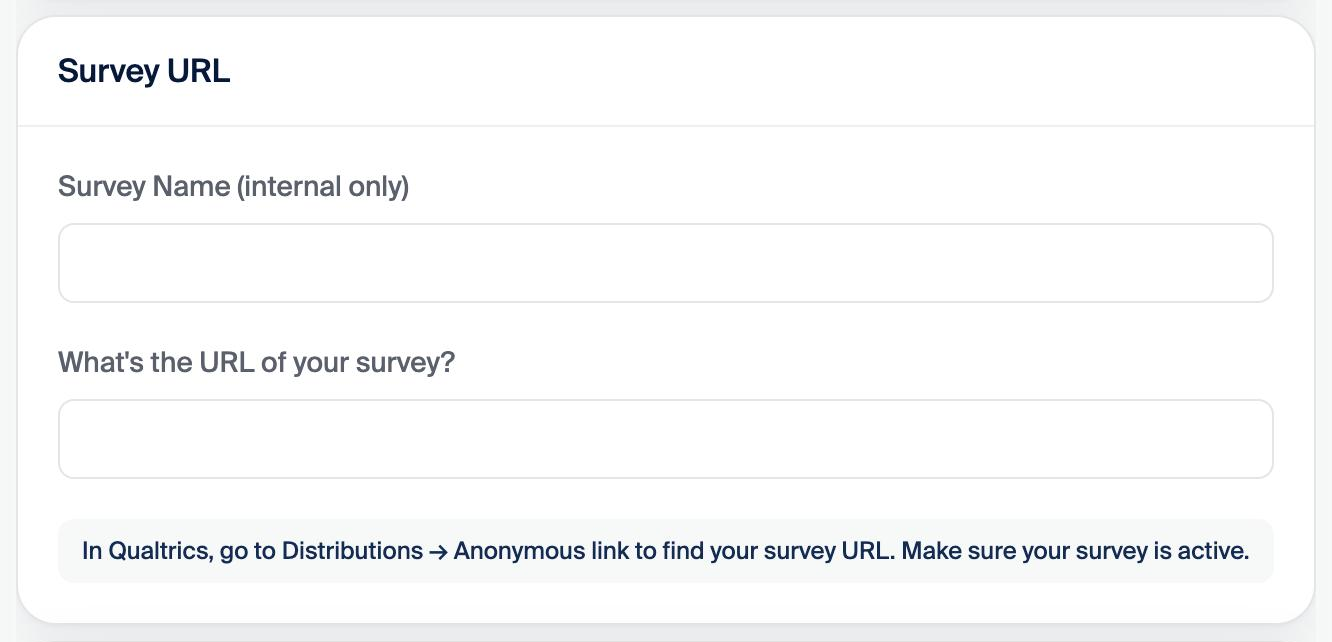
- On the Survey URL card, enter a name in Survey Name (internal only). Respondents never see it.
- Paste your anonymous link into What's the URL of your survey?. The survey must be active, or the link will not work in the Testing Survey step. If you paste an edit link, Self-Serve shows "Use your survey's anonymous link, not its edit link".
Next, set up your survey to record vsid and surveyid:
- Under Survey Platform, select Qualtrics or Other. If you select Other, follow Use another survey platform instead.
- In Qualtrics, open your survey's Survey Flow.
- Click Add a New Element Here and choose Embedded Data. Qualtrics adds the element at the end of the flow.
- Add two fields to it, named exactly
vsidandsurveyid. Leave their values blank. Qualtrics fills them from the survey link. - Drag the element above every block, so it comes first in the flow.

- Click Apply. Qualtrics saves the survey flow.
- Back in Self-Serve, click Confirm on "Add the vsid and surveyid parameter to your survey". The item shows a Completed badge.
- In Qualtrics, click Publish. Qualtrics does not use survey flow changes until you publish. Its publish window notes that changes can take up to 5 minutes to reach new respondents.
- Back in Self-Serve, click Confirm on "Republish your survey with these changes".
- Click Continue to Redirects.
#Step 2: Redirects Setup
In Redirects Setup, you add one redirect for each place your survey can end.
#Completes
Every survey needs the Completes redirect.
- In Self-Serve, copy the Completes redirect link with the copy button.
- In Qualtrics, open Survey Flow. At the end of the flow, click Add a New Element Here and choose End of Survey. Then click Customize on that element.

- Select Override Survey Options, then select Redirect to a URL.
- Paste the Completes link into the field.
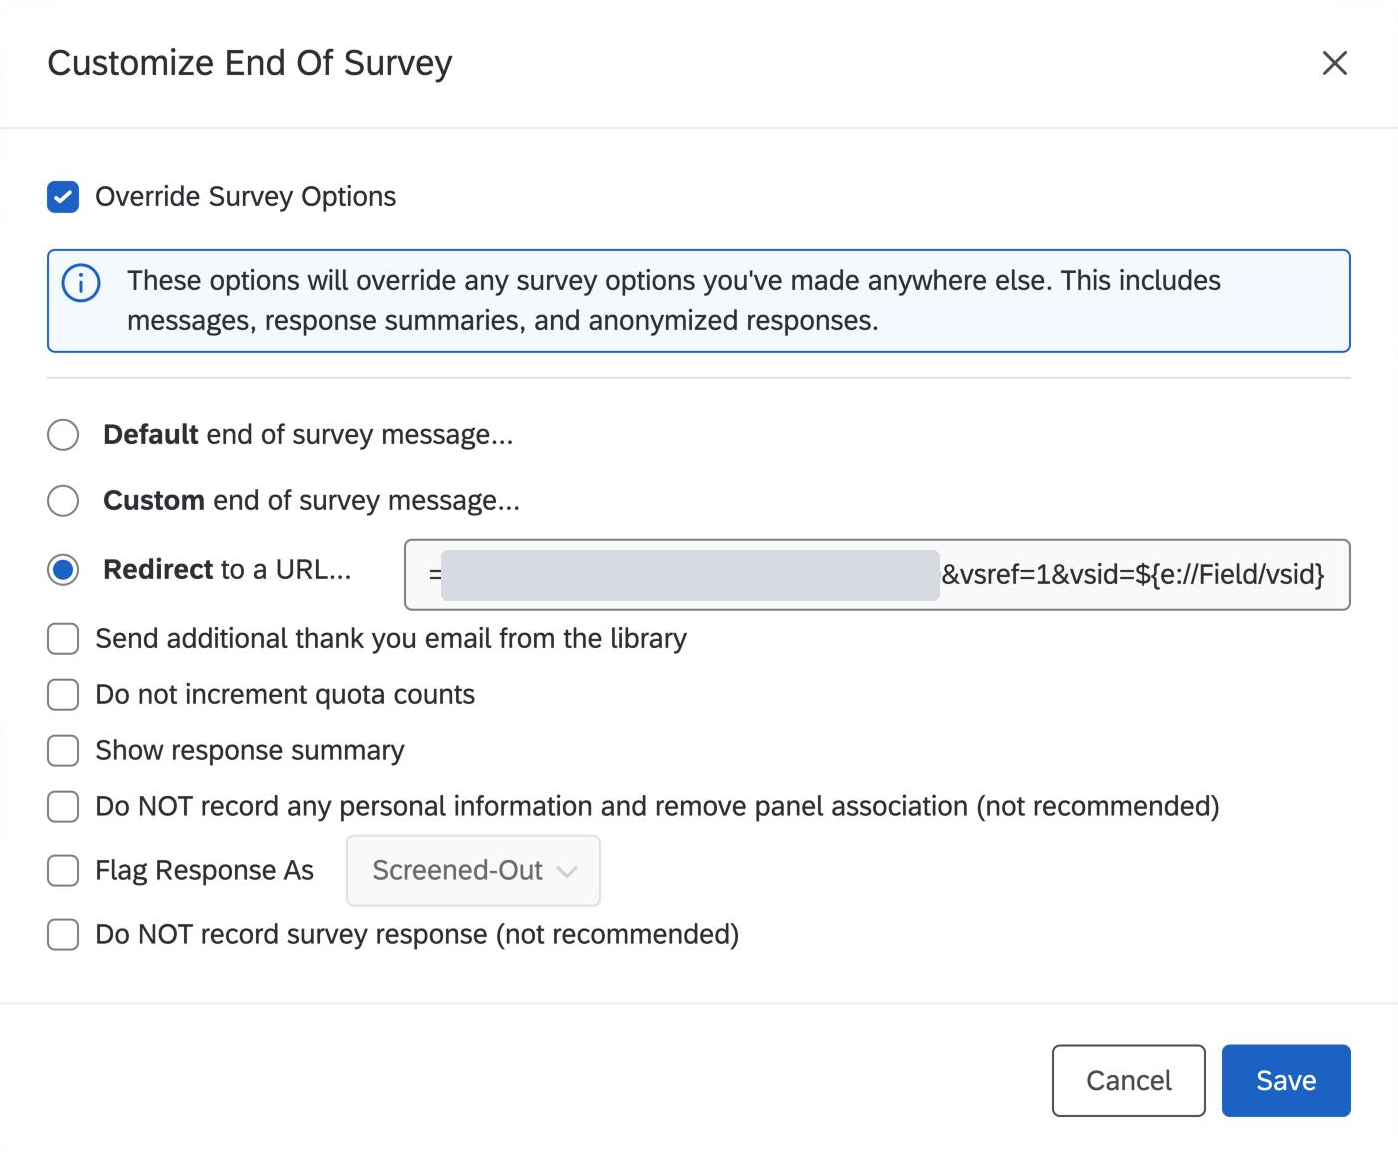
- Click Save, then Apply.
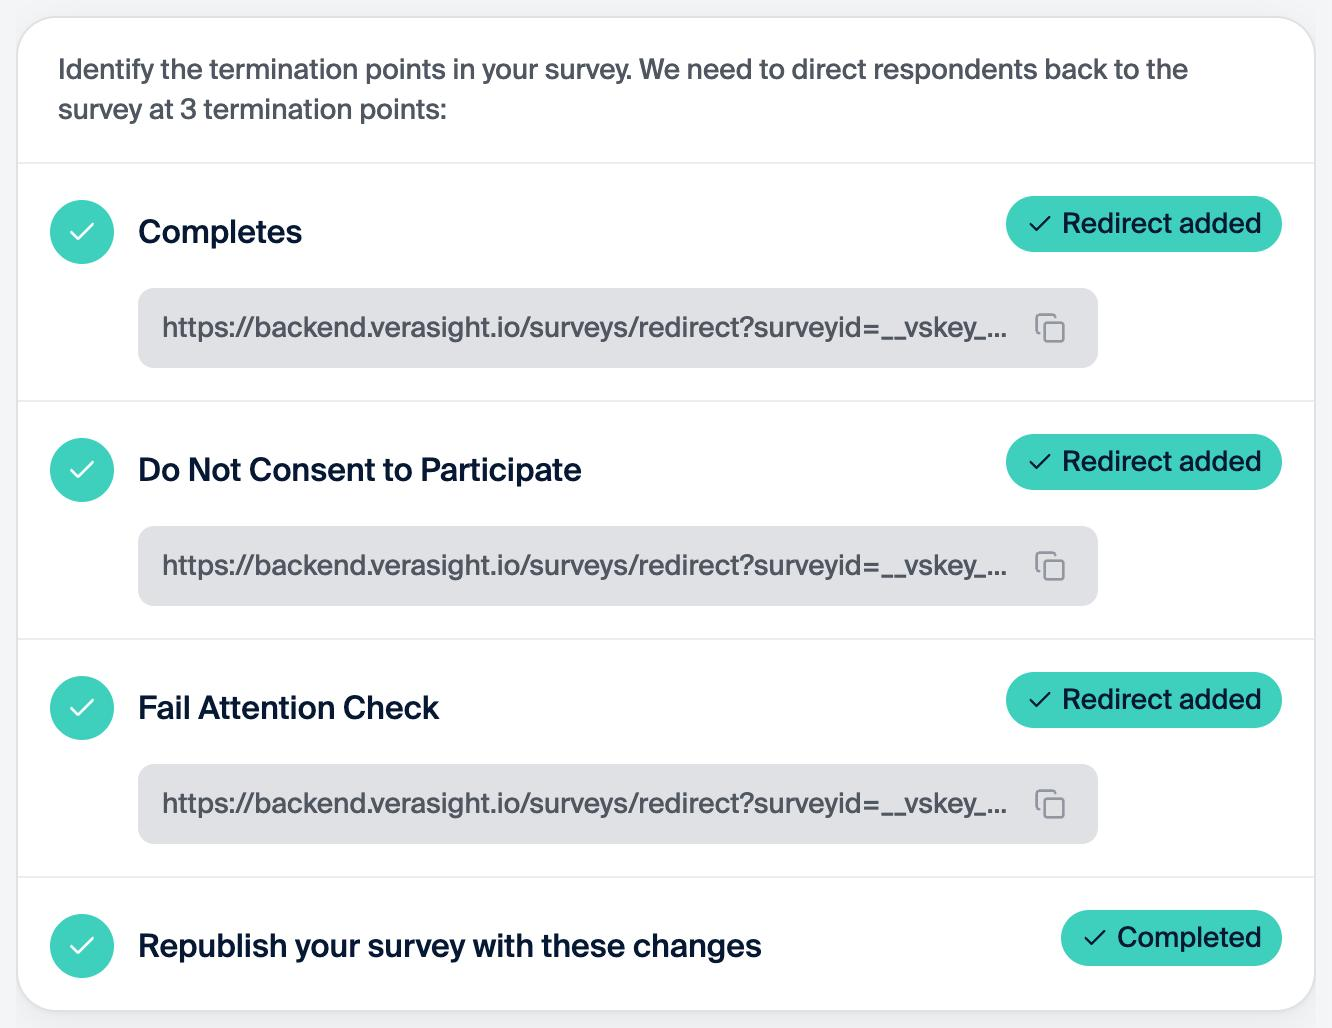
- Back in Self-Serve, click Confirm. The Completes row shows a Redirect added badge, which records only your confirmation. Step 3 checks the redirect itself.
#Do Not Consent to Participate
Self-Serve first asks whether your survey has a consent form. It then asks whether respondents opt out by clicking a response option. If either answer is No, there is nothing to set up.
If both answers are Yes, set up a branch in Qualtrics:
- In Self-Serve, copy the Do Not Consent redirect link with the copy button.
- In Qualtrics Survey Flow, find the block where the consent question is answered.
- Below that block, add a Branch element with this condition: the consent question, "No" is selected.
- Inside the branch, add an End of Survey element.
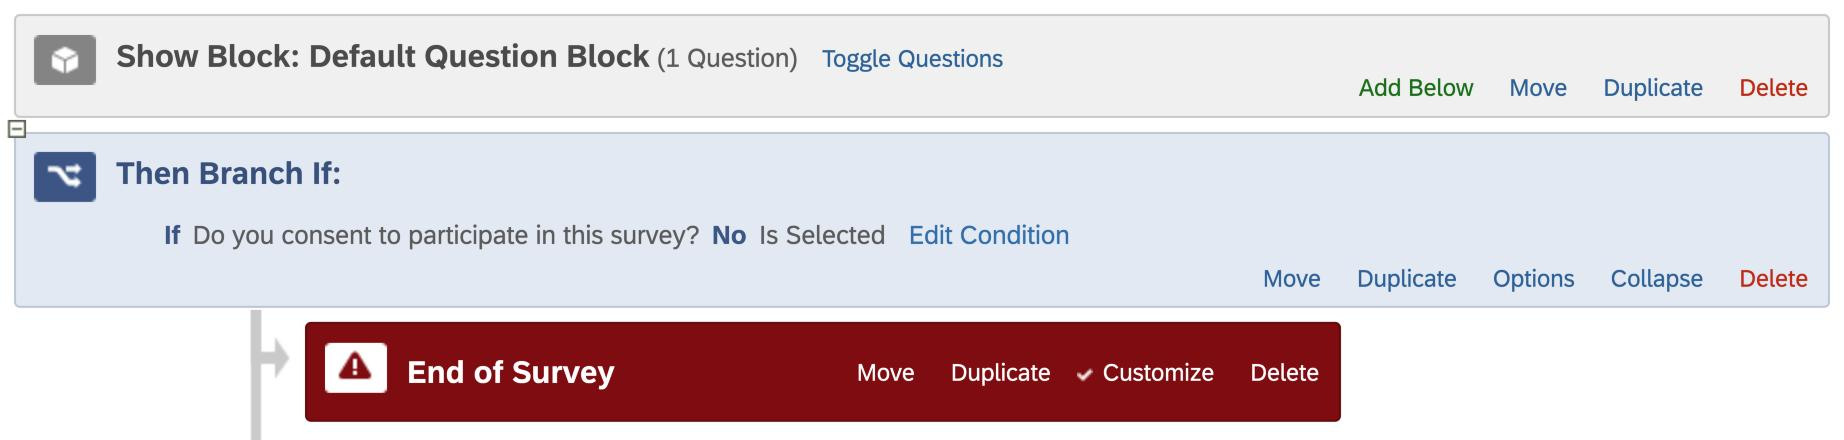
- On that element, click Customize.
- Select Override Survey Options, then select Redirect to a URL.
- Paste the Do Not Consent link into the field.
- Click Save, then Apply.
- In Qualtrics, click Publish.
- Back in Self-Serve, click Confirm.
#Fail Attention Check
Self-Serve asks whether your survey has an attention check. If it does not, the row shows No redirect and you can move on.
If it does, set up a branch in Qualtrics:
- In Self-Serve, copy the Fail Attention Check redirect link with the copy button.
- In Qualtrics Survey Flow, find the block with your attention-check question.
- Below that block, add a Branch element with a condition that catches the failing answer.
- Inside the branch, add an End of Survey element.
- On that element, click Customize.
- Select Override Survey Options, then select Redirect to a URL.
- Paste the Fail Attention Check link into the field.
- Click Save, then Apply.
- In Qualtrics, click Publish.
- Back in Self-Serve, click Confirm.
#Republish and check every ending
If an End of Survey element has no custom redirect, respondents who reach it do not return to us. This is the most common setup mistake.
- In Qualtrics Survey Flow, check that every End of Survey element has its own custom redirect.
- In Qualtrics, click Publish.
- In Self-Serve, click Confirm Survey Republished.
- When every row you use shows a green badge, click Continue to Testing.
#Step 3: Testing Survey
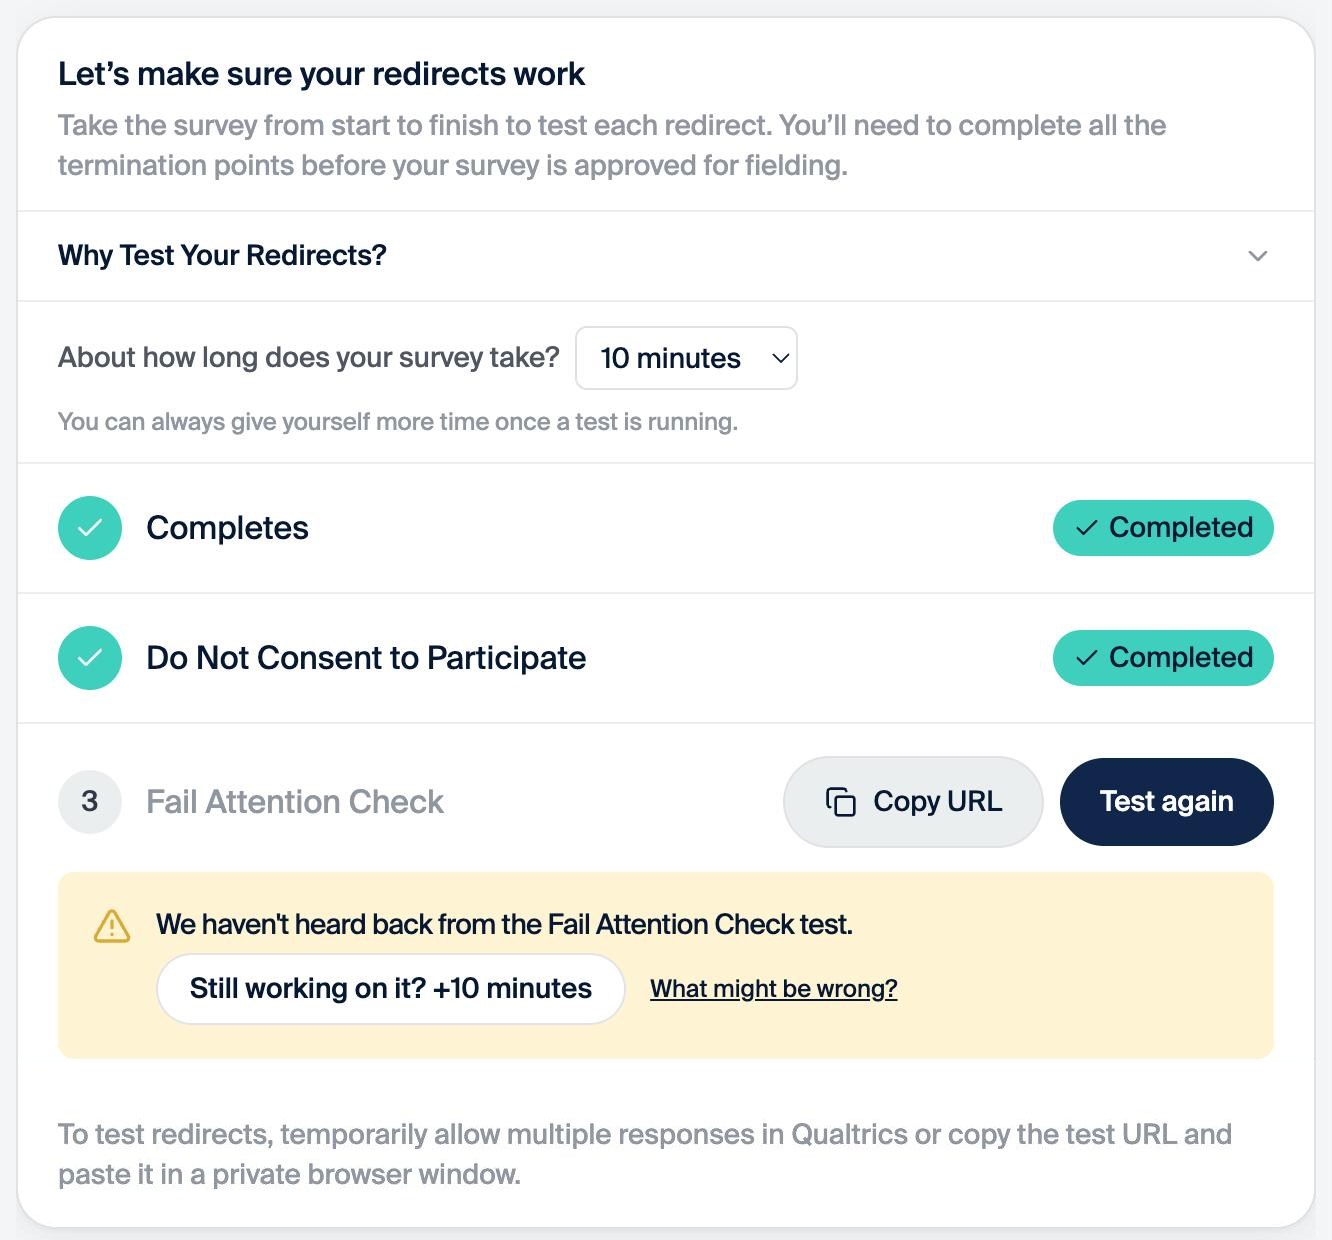
Continue to Payment stays disabled until every required test shows Completed. Once a row shows Completed, that redirect is verified. Test again appears only if a test times out.
We test redirects so that after launch our team only has to monitor your survey. A broken link means pausing your survey to troubleshoot.
- From the dropdown, choose about how long your survey takes. The setting tells Self-Serve how long to wait for each test, and the dropdown goes up to 20 minutes. You can give yourself more time once a test is running.
- On the Completes row, click Start Test. Your survey opens in a new tab with a test respondent ID attached.
- Answer every question and finish the survey. The row shows the test in progress. When your survey redirects you back to us, the row shows a green Completed badge.
If a test ends on the Qualtrics message "We thank you for your time spent taking this survey", that ending has no redirect. The row stays in progress.
While a test runs, Nothing happened? See common causes under the row lists what to check.
By default, Qualtrics does not block repeat responses from the same browser. If you turned on Prevent multiple submissions in your Qualtrics survey options, do one of these:
- Turn it off while you test.
- Click Copy URL on the row, and paste the test link into a private (incognito) browser window.
Only tests started from Start Test or Copy URL count.
- If your survey uses the Do Not Consent redirect, click Start Test on its row.
- Decline the consent form.
- If your survey uses the Fail Attention Check redirect, click Start Test on its row.
- Answer the attention check incorrectly.
- When every required test shows Completed, click Continue to Payment.
Next, pay and launch in Step 4, Payment & Launch.
#Tests that do not register
If a test does not register, check these first:
vsidandsurveyidare in an Embedded Data element at the top of the survey flow, above all blocks.- You published the survey after adding the embedded data, and again after adding the redirects.
- Every End of Survey element has its own custom redirect.
- No End of Survey element is inside a randomizer, where it may never run.
- Each redirect link was copied with the copy button, pasted in full, and left unedited.
- No redirect link is reused from another study.
- You started each test with Start Test, or pasted the Copy URL link into a private (incognito) browser window.
- The survey link in Self-Serve is this survey's anonymous link, and the survey is active.
If tests still do not register, email research@verasight.io.
#Use another survey platform
On another survey platform, you do the same two things as in Qualtrics. Capture surveyid and vsid from the survey link, and send respondents to the redirect links at the end of the survey.
- In the Configuration step, under Survey Platform, select Other.
- Set your platform to record
vsidandsurveyidfrom the survey link and store them with each response. Platforms call these link parameters, hidden fields, custom variables, or inbound variables. These help articles cover recording link values and redirecting respondents at the end:- REDCap: survey parameters and survey termination options
- Typeform: URL parameters and end screens and redirects
- SurveyMonkey: custom variables and survey end page
- Forsta: participant sources
- To capture the values for every respondent, record them before the first question.
- Copy each redirect link from Self-Serve with the copy button. With Other selected, each link ends in the placeholder
{{VSID VALUE}}. - Replace only that placeholder with your platform's field for the recorded
vsidvalue. Leave the rest of the link as we gave it. - At the end of the survey, redirect respondents to the Completes link. On the consent and attention-check paths, redirect to the matching link.
- To put the redirects in the live version, publish or activate the survey.
- Test each path as in Step 3: Testing Survey.
If your links end in ${e://Field/vsid}, Qualtrics is still selected in the Configuration step. Replace that ending the same way, or select Other under Survey Platform.
If you change Survey Platform after Redirects Setup, Self-Serve clears your redirect confirmations. Copy each new link and confirm the redirects again.
#Qualtrics help pages
Qualtrics documents each element in these steps:
- Embedded Data
- End of Survey Element
- Branch Logic
- Anonymous Link
- Survey Publishing & Versions
- Security Survey Options (Prevent Multiple Submissions)